Showing posts with label stashbusting. Show all posts

Monday, December 31, 2018

Sebright Bantam Dress

lukknits
Sebright Bantam Dress in Einband

I finally finished this dress, which had been waiting for me to pick it back up again for a couple of months, and just in time for it to be the last FO of 2018! Looking back, I didn't actually do much knitting this year - according to ravelry, just over 4000 yards in 7 completed projects - and here's the breakdown:

  • 2 of them were the same basic 2 x 2 rib hat (one for me, one for my mom, both of which I didn't take pictures of)
  • 2 more were testknits (Satinel & rumo)
  • 2 were gifts for my auntie Kit: chrysanthemum shawl by Francoise Danoy followed by a bolero she commissioned from me to wear to her son's wedding (for which I also forgot to take a finished photo of her wearing... I've really been falling off the wagon lately!)
  • Which leaves this 1 project that I made 100% for me: this Sebright Bantam dress, which was inspired by the silver Sebright Bantam chickens I saw at Center Island way back in the summer. Here's a photo of a silver Sebright hen from Wikimedia Commons (attribution in caption), because I failed to take a picture of the ones on the island.

Mark Robinson, Wikimedia Commons, Creative Commons Attribution 2.0 Generic license
Taken by Mark Robinson from Wikimedia Commons under the Creative Commons Attribution 2.0 Generic license. No changes made to the original image.

Aren't they sweet? And their plumage absolutely beautiful? So I decided to make a dress that was like their feathers. It came out more mermaid-like than I had envisioned, but I like the look of the mitered diamonds, and it's my first time working with this technique, so I'd say I did a pretty good job!

Which is not to say that there aren't a couple of things I would do differently next time, namely:
  • It's a bit tighter than I'd like. The fit is actually perfect, but because of the yarn/needle/construction combo, the smallest diamonds aren't as stretchy as they could've been if I'd kept the smallest needle size a 4mm or even just maybe 3.75mm instead of the 3.5mm I went with. Which means the dress is a bit difficult to take off - it's a tight squeeze out even if I take the both arms over the head approach. It works. It's just a touch awkward.
  • The Einband isn't great for next to skin wear, for me.
    • I suspect this issue would be solved if I used a slightly larger needle size for the smallest diamonds though, because then I'd be able to comfortably wear a full slip under this dress. As it is, I can wear a half slip, which is still good because the lower/larger diamonds are a bit sheer.
  • I underestimated how many rows of diamonds I'd need for the full length of the dress so that it would be long enough for my taste, so next time, maybe also knit a full row of diamonds more for both of the two larger needle sizes so that less of the dress is at the smallest diamond level.
That's basically it, though! Not too bad for a wildly experimental run where I had no idea what I was going to do for the neckline. I like the varied textures I ended up with, and I also used up some mystery mohair-like yarn I got from a stash swap - whoot! To be honest, I suppose the biggest issue right now as far as this dress goes is: where do I wear it?


lukknits
I'm going for a haircut soon, I promise


I've also been working on what was originally supposed to be a really lacy baby pink dress, but just ripped back most of the skirt portion because it wasn't looking how I wanted it to look, so that'll have to wait till next year to be completed. I'm not even sure I like the bodice part of it, but it's a construction I wanted to try, and I had an idea in mind for how I wanted it to be, so I'm going to roll with it and see how it turns out once I finish the new skirt.

Here's to hoping I'll do more knitting in 2019! I'd really like to make some more comfortable dresses with some of my superwash merino stash (of which there is more than I'd like to admit), for soft, next-to-skin wear, so there's a mood going forward! I've also really been slacking with regards to keeping track of my reading & film-watching, so I want to get back on that.

Wednesday, May 23, 2018

Satinel Test

test knit by lukknits
Beautiful rib pattern for the body!


This is the first time I've knit any of Asja Janeczek's patterns, and it probably won't be the last (Ziggyzack, Wild Grass, Whiskey on the Rocks, I'm looking at you) - I had a great time throughout with the attention to detail and interesting construction. Yes, it's a top-down raglan, and perhaps that seems pretty run of the mill, but it's made in a way that accounts for small details such as the way the short rows don't introduce asymmetry in the garment (even though I usually just leave it with one side having one more row than the other in my own designs - shame on me!) as well as the very narrow front which allows for the generous neckband. It's definitely something I would never have been able to think up on my own, and that's one of my favourite aspects to following other designers' patterns!


testknit by lukknits
Stockinette brioche


The only big mod I made to the original design (with permission) was to crop the cardigan so it hit my hip rather than my thigh. Of course, the sleeves were shortened as well to match the body so the proportions would work out. The only other thing was that because I don't own 3.75mm needles, having never had to use them before, I ended up using 3.5mm for all the brioche parts. It was my first time knitting stockinette brioche, and I really love the way the knit side looks! I could probably use that as the main fabric for an entire sweater, myself. The purl brioche I'm not sure how I feel about on its own, but the cuffs match the neckband, and I do like how it looks on the neckband. That's one of the details I was surprised by when I actually got to it, because the main photo for the original design was worn WS out, showing what looked to be a rib cuff (pretty normal).


testknit by lukknits
Worn wrong-side out, the rib pattern is more prominent


What really sold me though, was the rib pattern. at first I thought it might be a cable, since I've never really worked with rib patterns like this before, but I love how subtle it is from the right side! All the little details that went into designing this cardigan make it absolutely perfect for every season - I originally wanted to make it using a silver dk-weight silk/linen mix, but couldn't get gauge - and the knitting goes by very quickly with the easily memorized rib pattern that keeps things interesting as you go.

Thank you Asja for the opportunity to testknit this pattern!

Friday, September 29, 2017

That Movie I Haven't Watched Yet

lukknits
Aimed a bit high - wanted it to go around neck level.


The Wonder Woman Wrap enjoyed a tremendous amount of love the moment it came out from what I can remember, and there are currently (as of writing) 1086 projects, combined with the addition of being listed in 2393 queues. And that's only counting the knit version! That's phenomenal. But I think also well deserved. I downloaded the pattern back when it only had one size, so I'm not sure whether there have been any changes made since, but I followed the instructions exactly (without swatching), making no modifications whatsoever, and the shawl came out beautifully! It was a pretty magical moment watching it all come together; I don't think I've been so enthralled with pattern instructions for a while. Honestly, this pattern is absolute genius. The use of short rows and the different types of increases really makes this wrap sing, and I love it to bits!


lukknits
Those wings!


At least, I loved the making of it and the actual finished product. I don't see myself wearing it (in part because I haven't actually watched the Wonder Woman movie, so I feel as though I'm not quite qualified to do so). Which is why I asked a coworker of mine whether she would be interested in wearing it - and she seemed absolutely ecstatic over it, so I'm glad for that! - and now it has a wonderful new home where it will be loved and worn, as it was meant to be. Hurrah!

I'm actually pretty inspired by this pattern to use more short rows and increases & decreases to create shapes in general. It's really cool and was a lot easier to knit than I would've thought at first glance. Maybe something to consider for future designs?

Sunday, August 13, 2017

5-Year Old Sheep

I suppose the sheep are closer to 3 years old since I reknit them all in 2014?


I think I can call it a year now. This sheep sweater-turned-vest-turned-sweater has finally - finally - been finished! It's come a long way, and I just discovered the progress updates information on the ravelry project page, so I have a bit of a better idea when I did what... kind of:

  • April 2012: CO and work on it sporadically until sometime in May
  • 21 months pass
  • March 2014: join in SSKAL14 in an attempt to motivate myself to work on it again - it didn't work.
    • I ripped this out all the way until the ribbing, re-knit the sheep and basically got myself back to where I was before picking it back up again, I think?
  • 4 months pass
  • September 2014: unfortunately I didn't write any notes down as to what I did to it during this time, but I remember just knitting it straight up to the armholes and starting the armhole shaping
    • I also started to knit a sleeve, because my original plan was to knit it all in one piece, connecting the sleeves and knitting the armhole shaping all at once.
    • The sleeve was frogged for several reasons: it was way too roomy because of the sudden increases right after the ribbed cuff (part of original pattern that I ended up changing), but also because I was rethinking how I wanted to knit the sweater
      • I think I also decided to make it into a vest around this time, so that probably gave me a good reason to just rip out that entire sleeve.
  • 33 months pass - 33!
  • July 2017: pick it back up again, just in time for the SSKAL17!
    • Had to re-knit the ribbed neckline once because I just winged it and it was a bit of a tight fit.
  • August 2017: finally done!

It's been a long time coming.


Longer armholes next time, maybe?


To tell the truth, I probably wouldn't be casting this on if I saw the pattern today. It might make it into my favourites, but I don't think I'd even have added it to my queue: I just wouldn't be able to see myself wearing it. So thank goodness I cast on before I started actually thinking about the practicality of casting something on! It's a pretty basic sweater, and I know the sheep aren't all that sheep-like, but it's cute, it's comfy, and I think it'll probably see some use once fall and winter roll around. It's actually the first stranded sweater I've ever knit, and what's even more amazing is that knowing that there was colourwork all throughout the entire thing didn't faze me a bit - me, who had yet to do any stranded knitting before; who didn't get gauge so had to recalculate the pattern (though this has never really fazed me so much as irritated me because it was extra work - though satisfying once everything came out just as it was supposed to!); and me, who didn't understand what magic blocking could generate (as evidenced by the pink sage). Though I'm pretty sure everything to do with knitting can't be that difficult, really, and that it's mostly a matter of practice and going for it, which has been my attitude since I started. And which is why I ended up knitting wight in a completely different gauge, and did the math to make a sage pretty early on. Knitting finally made me see the practical use of the math I had been learning all those years - truly, it did!


lukknits
Loopy stitches possibility - neckline too wide to do this


Originally (by which I mean my Plan B after I decided I'd cut myself some slack and make it into a vest instead of a full-blown sweater), I was going to add a loop stitch funnel neck (as in the sketch above) to really bring out the sheep colourwork at the bottom hem, but the neckline ended up too wide and I really didn't want to rip it out and re-knit the neckline for both front & back again, so I ended up just doing a regular red ribbed collar. Because all the measurements for the finished garment were for a slightly drop-shoulder sweater, it ended up being too wide to change into a vest, so despite having ripped out an entire sleeve before some years ago, I went ahead and knit some sleeves to go with the body. Everything came full circle.


Impractical with shorts? Definitely!


This sweater has gone through so many revisions, starting as a sweater and then turning into a vest, then returning to the original sweater plan because the body was just too wide to be a vest; not to mention the frogging of everything except the ribbing at one point! It's been a solid 5 years since I cast on in April 2012 and I'm so glad it's done and out of my WIP pile! And now I've only got one more long outstanding WIP: the Sherwood sweater for my brother. I started that one in July of 2013, so I've got one full year more to just get on that before I break my record for this sheep vest. It will get done eventually, or so I tell my brother (who has  long since stopped asking about it). At least my completion of the sheep sweater should serve as proof of my word!

Wednesday, July 19, 2017

Riff Dress

lukknits
Just finished a dress.

In light of my recent addition to the stash (though really, I haven't been adding to the herd much this past year or so), I feel as though I should put on a proper show of stashbusting at the very least. Granted, the Rosebleed shawl was also knit using yarn dug out from somewhere around the middle layers of my stash, time-wise; I purchased both this teal cotton and the studioloo lacey loo at the same time at the Knitter's Frolic a couple of years back. Maybe there's an incubation period that yarn has to go through before I can finally use it? (Though I'm not sure what that means for all the yarn that I bought when I first started into the knitting abyss and have yet to use...)

Anyway, this dress was a riff off the Country Garden Top pattern, using completely different yarn & needles producing a different gauge and completely disregarding the pattern altogether save the feather and fan bib. I also took the idea of knitting the straps past the front and attaching everything at the back. And that's basically it. So I think of the Country Garden Top pattern as more of an inspiration than anything, but I'm also veering heavily towards "let's not make a pattern out of this".


lukknits
More slip dress-like than I planned

I was aiming for a summery dress, and to be sure, this fits the bill, but I overestimated how much 40" would be once it went completely around the bottom hem of the dress, so it's a bit less voluminous than I wanted it to be. In hindsight, I should have skipped the A-line shaping altogether and did heavier decreases at the top, just under the front bib, to get a more dramatic shape out of it, but I suppose this is fine too. It came out rather more slip-like than babydoll dress-like, but I think I can work with this - and it supports layering!

The yarn gives this dress wonderful drape, as you can see in the photo above, and the cotton makes it heavy enough to actually hang down rather than float about me, which I sometimes get when working with light wool. I was afraid that I was playing yarn chicken throughout - the original plan was actually to introduce another yarn to colourblock the straps/back because I thought I might not have enough yarn - until I realized that the first skein of yarn (out of two) took me well past half of the entire dress. It would probably have worked out just about perfectly if I had skipped the body decreases and just knit a straight tube up until the armholes, but alas. I'm pretty happy with how the back turned out, though! It's a bit of a hassle in terms of making it work with a bra, but isn't it always? And the straps going all the way from the front to the back was a nice touch, which I probably wouldn't have done normally, so I'm glad I took a look at the Country Garden Top pattern (if only just to double check that what I thought was feather and fan lace was actually feather and fan lace).


lukknits
Not as sheer as I'd feared, either!


The entirety of the pattern I drafted was worked out on the yarn label, so there isn't much to go off of, and I'm not sure I really want to write this one out at all, as I mentioned above. We'll see if I ever do it, but in case you're interested in knitting this up yourself, here's the recipe:
  • It's an A-line dress, knit bottom-up.
  • CO a multiple of 18 sts for the bottom hem (the feather and fan pattern is an 18 st repeat)
    • I cast on 40", but I would maybe suggest even 50~56" if you want to do the body decreases throughout to get a nicer silhouette
  • If you want the A-line like I did, decrease slowly up to the armholes
    • You don't want to decrease down to your bust measurement though! You're going to be doing *k1, k2tog* or some variation thereof (I think just k2tog to end, or even *k1, k3tog* might be better), so make the calculations as to how many stitches you need before starting out the armhole shaping
    • Keep in mind also that you'll be binding off about 1" each side of both front & back pieces! Those you don't need to account for in terms of the decrease row.
    • I also think it might be better if we keep the decreases to the front bib (but do it all along the back), but that's up to you. The ribbing of the strap does help ease the look.
  • Armhole decreases/shaping (do this in reasonably few rows, because you want the pleats/gathers to be right over your bust - I decreased one stitch/side, every row, 3x)
  • Gathers row: whatever variation of this you decide on, just do it across to get to the measurement you need to cover your front
    • Keep in mind that the ribbed straps will pull in a bit, so keep a few stitches (or just don't do the decreases as heavily) in the strap area to accommodate for this
      • I forgot to do this, personally, and remedied it by pu&k around the outer edge of the armhole, which worked
  • Mark off however large you want the front bib to be and start feather & fan lace, placing markers to mark off where the ribbing starts/ends and where to work the lace
    • Work even until high enough for you, then BO all feather & fan lace part
  • Work straps individually until it goes around to the back, minus however high you want the back neck to be.
    • I worked the back piece armhole shaping and all that just past the gathers row so it was ready for grafting while I was here, also. Just use another skein or use the other end of the ball of yarn you've got.
  • Long-tail CO back neck stitches using scrap yarn and knit across to join both straps to main body piece once more.
    • Work in rib until long enough to reach back piece.
  • Graft together using kitchener stitch. I'm not sure if it's necessary, but I made sure to adjust the instructions for whenever I saw that it was a purl stitch next rather than a knit stitch (because one side is ribbing), to make it a smoother transition. I know this is something that makes the work look better if both sides are ribbing/not stockinette, but I'm sure it would have blended in just fine even if you just do the regular ol' kitchener.
  • If you would like to add some stability to your straps, PU&K around outer armhole (I didn't even count, but I did just pick up every edge stitch I saw - I slipped first stitch of every strap row, so you might actually want to do a different pickup rate)
    • I didn't do that for the inside, because I liked how it looked better without, but feel free to do whatever!

I know you're thinking there's no way I could possibly have written all this onto one yarn label, but that's because I was making stuff up on the fly as well. It's mostly just the calculations, so it really does fit on just a few lines!

Have fun!

Tuesday, June 20, 2017

Rosebleed

lukknits
Alistair's Rose Pi Shawl
It's been a while since I've knit anything, or so it feels - anyone else noticing a pattern of all-or-nothing going on here? - but I finally got myself to start something up, starting with a skein I've been wanting to use for a couple of years now: Studioloo's lacey-loo in Roseblood. It's a lovely deep, saturated pink that reminds me of honeysuckle (even though I didn't actually know what honeysuckles looked like until I searched them up for writing this post to make sure they are what I'm being reminded of... yes. Even then, they reminded me of honeysuckle) or an overripe fruit, overlaid with a touch of honey to bring forth that almost golden glow - I say almost because there is zero that is yellow or golden to this colourway, and the illusion of a golden pink is only through the slight halo arising of its singles construction, producing the slightest of a golden aura, albeit an imaginary one. The yarn itself is soft and surprisingly strong, and I found zero knots in the entire skein, which meant I had exactly two ends to weave in at the end of all the knitting: the cast on and the bind off. So much for what I love about the yarn, and now onto the murky cons, specifically: it crocked like nothing else (except for maybe that other saturated pink, the madtosh tosh dk that I used for the chevron bomber - I'm tempted to conclude torchere has some relation to torture, that. What's with the pinks?), and subsequently, unsurprisingly, bled into the soak. I tried rubbing it vigorously against a white fabric surface after it had dried to see if it would crock again, but it didn't transfer any colour, so perhaps all the excess dye washed out in that one soak? Probably just my wishful thinking.


lukknits
It blocked out spectacularly! I also can't aim my camera today.

I knew from the start I wanted to use more or less the entire skein on one project (it took 979 yards total to make this size using 3.25mm needles and laceweight yarn), so a pi shawl seemed the best bet, besides which it had been a while since the last one and I've been itching for a large project since finishing the brioche dress. (There might also have been the little issue of me not wanting to do the whole nine yards for swatching, so garments were out of the picture altogether.) And of course, having such a saturated pink in a colourway called Roseblood, of all things, I figured I should go all in or nothing and look for something flowery in design. Alistair's Rose Pi Shawl seemed (and I think did turn out to be) a pretty perfect fit, so I went for it. Now, the design's lovely and very easy to follow - I think everything's pretty self-explanatory upon seeing the charts, especially if you understand the mechanics of a pi shawl.


lukknits
Just to see the edging, which I ended up pinning while it blocked.

However. And this is a very stressed however. If you follow the instructions to the letter, your charts will not match up. They will not be centered. It's not by much - one stitch, and what's one stitch in the grand scheme of things? Can you tell I only found out after the first chart? Can you also tell I goofed, twice!, and tried to fix one of them? No? Good. - but if you, like me, are the type to be bothered (but apparently not bothered enough to rip back after discovering that yes, I would have to rip back an entire chart or two) by this one stitch off-centered design, then you just need to insert these lines into the pattern as you work your way through:

  1. Before working Chart 2, after working the yo & K rounds: sl first stitch of round so it becomes the last stitch of round
  2. Before working Chart 3, after working the yo & K rounds: sl first stitch of round so it becomes the last stitch of round
  3. Before working Chart 3B: sl first stitch so it becomes last
  4. Before Chart 4: sl last stitch of round so it becomes the first stitch of the round
I believe that's all. I'm pretty sure the direction of slipping stitches I've provided here is correct, but just pay attention to the numbers (count how many stitches until the center of the chart below, and make corresponding changes to current chart). I made the mistake of not looking through everyone else's projects before starting, also, so although a number of others have made a note of this already, I failed to see it until I encountered it myself.


lukknits
Perfect size for doubling up as a crescent shawl


The original plan was to keep it for myself, but as with all the best laid plans, this is going to become a gift. My parents mentioned my cousin very briefly while I was knitting this and I haven't been able to get it out of my head thereafter that this shawl is to be hers. Not that I know her very well, unfortunately, but I do think it would look lovely on her, from the couple of times I've seen her over the years. (I'll have to make especial mention of possible transfer of colour though. That's actually quite worrisome.)

I suppose a pi shawl for myself will just have to wait till the next shawl itch comes around.

Wednesday, May 3, 2017

Burnt Brioche Dress

elsebeth lavold eucool
Stretched vertically, but shaping still falls within acceptable range - huzzah!

According to my ravelry project page, this dress has been in the works since 2015, which sounds about right to me; it certainly feels like it's been forever or so. Technically, this version of the dress has only been in the works since October 2016, and I've had projects on and off between stints of knitting this up, so once I got the math figured out, it came together pretty nicely (if I do say so myself) and without too much fuss. It has gone through a couple of false starts though, from two bottom-ups to working out the issues with the CO and raglan shaping (see below), and I'm very pleasantly surprised at how well this yarn has held up to so many frogs! Blocking itself took 2 days to finish because of the torrential and not-so-torrential downpours, with the humidity that comes of those, so fortunately for me, it dried out just in time for the one sunny day of the projected week! (I thought April was supposed to be the rainy month and May was supposed to be sunshine, lollipops flowers, and rainbows. April showers bring May flowers, or so I thought it was supposed to go.)


elsbeth lavold eucool
Side-split hem.

Onto the details:

  1. Top-down. The CO took me 3 or 4 tries to get right, because the regular brioche CO looked much too loose to me, in that it looked really sloppy. In addition to this, I had calculated a neck size that was a smidgen too small the first two times, I think.
  2. Raglan sleeve shaping to get the sleeveless dress, because I really like the look of it. This part took two tries, from ripping out all the way back to the base of the neck to the end of the raglan shaping. After I got the correct shape, I BO the raglan "sleeve" stitches and split up the front and back, continuing down flat before doing quick armhole shaping and reconnecting to knit the body in the round.
  3. Shaping spread out between the center back-ish area and the sides (for the front). These come down a little lower than I had originally knit them, because it stretched out a bit during blocking, but thankfully they still fit within the right areas or so. I'm eternally grateful I don't have to rip back and reknit because they shifted downwards.
  4. The original length was actually the slit starting high/mid thigh and the dress ending just below the knee, so the vertical stretch dragged the entire dress down to mid-calf area. This also worked out (and I kind of planned for this eventuality also, stopping below the knees so I'd be happy if it stayed there or if it stretched down) - hurrah! I was worried I'd have to kitchener an inch or two from where I started the slit, but because it stretched out, it saved me a bit of work there.
  5. I reinforced all - I might have missed one or two raglan edges though... - of the potentially weak spots where I split to knit straight or reconnected for in-the-round. Both split hem areas have been sewn together, as have the AHs and especially the one raglan point that was particularly weakly connected (I think it was just the nature of the construction that that specific connection was going to be a bit more tenuous than the rest of them, but I probably could have done something to avoid that to begin with, like doing a k2tog or something). It doesn't feel like it's going to fall apart anywhere, so I'm going to be happy with that until it does.
  6. I probably should have foreseen this, but it's a bit see-through, which I'm going to say was unavoidable: knitting at a tighter gauge would have destroyed me physically and emotionally, and I'm not sure whether the fabric would have been too stiff if I went down a needle size besides.


elsbeth lavold eucool
I'm bffs with my wall. Doing Fusion Dance with it, DBZ style.
All in all, I'm pretty pleased with how this turned out! I'm thinking of writing up the pattern for this, as has been the plan for the past three years, but there's no projected timeline whatsoever. I'm coming to realize that setting myself these deadlines is an exercise in futility. Who knows? I might even be more motivated to finish it if I'm not forcing it on myself.

Tuesday, April 18, 2017

Yellow Holes

It's such a nice fit! And super comfortable, too!

Jutta von Hinterm Stein has designed a beautiful cardigan that can easily be dressed either up or down, the Holey Comfort, just in time for spring weather! Even better, I got to testknit this beauty for her! This is actually my first time knitting one of her designs, although I had been drooling over a couple of them over the years. See the Low Budget Pullover, Turnaround Diamonds, Louvre,  Slim Lines, Cross Pockets, and Hourglass, to name a few.

The entire cardigan looks so beautifully structured, but it's completely seamless!

Because it was my first time knitting one of her patterns, getting used to the way the instructions are written took a bit of time. Jutta is very clear in her instructions, but do make sure to read through everything in the section before starting so you know what's happening. In my haste to knit up this cardigan, I misread some sections and ended up having to rip back the equivalent of about one whole sleeve's worth of knitting! However, the pattern itself is very detailed, and Jutta takes care to introduce charts where they are relevant within the instructions instead of putting them all on another page at the end, which I quite enjoyed. There are also many little details that make the finished cardigan fit beautifully! I was worried at first because the armhole seemed so large (it stretched a couple of inches further down from my actual armpit than I would have expected it to when I tried it on), but just trust in Jutta and knit on!

Should I make another?

I made no changes to the pattern, but here are a couple of notes for anyone observant enough to notice and wonder why it's a bit different:
  • My gauge was off, since I couldn't get the specified 25 sts x 34 rows despite several gauge swatches and yarns/needles combos. I had 27 sts by 38 rows, so I knit up a size (M) to get what I needed (S).
  • The yarn was held double, so it took me about 1730 yards, which is much more than the specified estimated yardage for size M (1250 yards). I suspect this is due to my gauge difference, and would trust Jutta's yardage estimates over mine.
    • Another note on the yarn: while it's lovely stuff, there's a ton of oil in it and it biases like nothing else I've ever knit with (except for maybe my own overspun yarn). I'm not sure if the milky yellow that washed out was the oil or the extra dye, or both, but it looked pretty disgusting, to be honest. Prewash the yarn in hot water with some citric acid if you can. Otherwise, go through a couple of hot soaks before blocking, with citric acid. I noticed the same thing happening to a slightly lesser degree in my mokoshi, so now I'm absolutely certain that it's caused by this yarn and not the Louet linen.
  • I made a mistake in the right neckline by a couple of rows. It's not too noticeable, so I kept it (also because I was pretty behind in terms of the test deadline). It also did not affect my stitch count, so all's well.
  • When I connected the sleeves in the round, I'm not sure what I did wrong, but I kept getting a hole in the armpit area, so I just left it and sewed it up afterwards. If this extra little bit of sewing will irk you, I would probably just knit the sleeves flat and then do a major seaming of both of those after blocking instead.
Whaddya mean my yarn biasing means the back increases aren't centred?

This was also a huge stashbust in that I've got less than one cone - specifically, 365 yards - of this yellow left! Hurrah! I mean, I love the colour and the yarn itself, but I don't actually need that much sunshine yellow in my wardrobe (or at least, I don't think I do?). The major biasing that I can't fix even when blocking is also a bit of a downer, so I'm pretty happy I'm using it up and getting lovely results out of it!

Friday, March 10, 2017

There's no snow on the ground, but here's Snowdancer anyway

Knee-deep, dancing in the snow (except there's no snow out there)

I'm quite late in submitting my testknit of Snowdancer, but I'm finally done! I had a couple of false starts, using a different yarn, which turned out to be much too transparent for my liking; changing the pattern to include picot edging (to go with the scallop pattern, of course); etc.; none of which really panned out. So in the end, I pretty much followed the pattern, with a couple of mods:

  1. Because of differences in gauge, I CO one size larger, as well as adding a couple of increase rows to the raglan shaping.
  2. I lengthened the entire thing into a dress and changed the position where I started the chart, postponing it to the very bottom, right before the "ribbing". I also added four sets of body increases, but I'm wondering whether I should have done that at all at this point or kept it slimmer. Oh well. It's also a bit longer than I planned, but I really don't want to have to rip back a fourth or fifth time, whichever iteration of this garment it would be!
  3. Instead of ribbing, I ended up doing a 1x1 faux stranded ribbing, ending everything with an attached i-cord edging to prevent the hems from flipping.
  4. Changed up the sleeves by cutting them short at half sleeves, as well as changing up the part where we switch colours.
I haven't blocked the i-cord edging for the bottom hem yet, so the sleeve is the best detail I've got.

I have a couple of misgivings about the length of it, like I mentioned above, as well as the edging that I chose, but honestly, I wanted it done. I've ripped it out enough times - the cone yarn withstood all of it so well that I'm actually quite surprised! Both yarns are singles, too! - that I really just don't want to have to tinker with it anymore. (I suppose that's what I get for tinkering with the pattern to begin with...) And the end product is definitely wearable, not to mention really light and warm (and surprisingly comfortable in that it's not itchy), so I think I can stop.
It's really a great pattern to build off of, for making a basic sweater, complete with really simple colourwork for those of us who are terrified of the idea of doing huge swathes of stranded knitting! I would definitely make this again, though probably just stick to the pattern and make a basic sweater next time.

Wednesday, September 14, 2016

It Looked A Lot Darker At The Store...

lukknits
Louet Black Norwegian Wool & sweetgeorgia yarns merino (silver)


I've finished spinning up one bag of that Black Norwegian Wool, with a total of 201g between all 4 skeins. Some of the remaining 24g had gone to the samples I spun up prior to doing the entire batch, but a bunch of it was lost during skeining on the niddy noddy because it was underspun. It held together fine while on the wheel, but I think the combination of not-quite-enough-twist + this stuff was top, not carded fiber + relatively short staple = big fluffy mess of tufts of fiber coming apart as I wound the skein. In the end, I added some twist to 3 of these skeins, giving up on the idea of winding them as is after the first one was done.


lukknits handspun
Not-so-black Norwegian Wool


After a good soak, the water came out a yellowish tinge - lanolin, I'm assuming? - and the yarn didn't twist in on itself at all once hung up on hangers, even without any weights. Hopefully that's a good sign that it won't bias too much when I actually knit with the stuff. On the upside, they're very soft and feel light and lofty! They came out pretty much exactly the way I wanted them to (if you ignore the inconsistencies in thickness), in the skein. We'll have to see how they knit up. On the downside, I kind of didn't realize how brown - not dark dark dark almost-black brown, just a very dark brown - this fiber was. 'Kind of' because I knew it was a dark brown from the outset, but it still looked a lot more like black down in the basement of Romni's. So the turtleneck is probably going to come out as a dark brown, almost-but-not-quite-existentialist, sartorial statement.

Speaking of existentialism, there was a little anecdote in At The Existentialist Cafe about Sartre being commissioned to write a preface for someone's book or another, and a while later returning to his editor with a 700-pg draft, which subsequently became its own book - I didn't note whether or not Sartre ever delivered on the preface though. Man after my own heart.


lukknits handspun
sweetgeorgia yarns merino fiber (silver)


And now back to the spinning: the merino, spun on a drop spindle many many many moons ago (2014, according to my ravelry handspun project notes), held up much better. Only one section that came apart out of the entire cop. I'm probably going to just spin the rest of it on the wheel, aiming for a 2-ply laceweight yarn, I think.

Monday, August 22, 2016

The Year of...

Karen Luk
Majas Mamelucker by Maja Karlsson

Woolen undergarments, apparently. First the Summer Bralette (blogged here & here), then these Majas Mamelucker (both by the same designer) - what's next? (There are a lot of vintage woolen undergarment patterns floating about...)

Wellington Fibers and Araucania Ranco
Seams? What seams?
The Majas Mamelucker pattern was quite easy to follow, after the translation process and figuring out what was what. (Mods are listed below.) The resulting shorts are very comfortable, as you might expect, although I'm having some fitting issues concerning the crotch area. I actually suspect that it might be because my gauge is off (surprise surprise), though it was close enough that I threw caution to the wind, even knowing the one size pattern would come out a little large... but that's what the ribbing's for, isn't it? Anyway, they're only slightly loose, and even that might just be because I prefer more skin-tight shorts if they're going to be worn under any other clothing. The crotch piece is a couple of stitches too wide though, so I would suggest either removing 5-6 stitches or so from the crotch area (and redistributing to the sides) or not increasing those 5-6 stitches in the front/back pieces in the first place. The ribbing does a great job in terms of fit, and you really don't even need that many stitches if you fall under the size listed.

No modeled pictures because they're short and I haven't a clue what to pair them with. They're also - in case you haven't noticed - super high-waisted, which is great for winter! Next time though, I would make the waist even higher - maybe knit 2~4" more of ribbing, so that when they fold down, they're still at the natural waist.


year of woolen undergarments
Look at that waist!
Now, mods:

  1. None, really, except for knitting the entire thing in pieces because I wanted to use my Wellington Fibers 30/70 Mohair/Wool, which wasn't enough for the entire piece. So I decided to colourblock the shorts with some Araucania Ranco, which meant knitting the sides & the front/back pieces separately after the waist ribbing. Then I kitchenered them together before doing the ribbing for the legs.
  2. My gauge was off, but by a small enough fraction that I just forged ahead anyway, especially since I knew the ribbing would pull in enough for the shorts to stay up.


Sunday, July 31, 2016

FOs of July (and before)

I have some more photos of finished projects from July and also a couple from way before!

Karen Luk
mokoshi in linen & wool
Wow. Linen and wool act really weirdly when together. After blocking, mokoshi seemed to shrink down a bit down to my size, despite the fact that it looked about half a size to a full size too large while I was knitting it! It's probably because the linen just hangs so well - fixing the problem of the super flouncy flounces, too - that the extra fabric ends up hanging down instead of poofing out. Also, I'm not sure which yarn it is since both of them are yellow (and thank goodness for that, too!), but the yellow turned a murky yellow just minutes after putting the entire thing into a basin with water. I did this three times thinking it might just be excess dye before deciding to try adding some citric acid to the (hot) water before adding the garment and letting it soak for about half an hour or so, and all came out well! Not a trace of colour came out of the yarn after that. I wore it out for an entire day, and I noticed when I came home that the armhole had sagged a bit - probably because of the linen content - but not enough that it looked weird. Next time I work with linen, though, I'll keep that in mind. All in all, lovely pattern - well written, well thought-out - and I enjoyed working with both yarns! The Colourmart soft wool had this oddly sweet smell to it that I especially liked while knitting the body, although I'm pretty certain it's the oil that's used to make the yarn keep to itself on the cone. (The smell more or less went away after blocking. After another wash, it'll probably be completely gone.)

Karen Luk
Summer Bralette - a free pattern!
 Here's the Summer Bralette, not modeled! You'll just have to take my word for it that it fits well, although I had to make a mod to the garter stitch band length, as I mentioned before. It's also super warm, which makes me wonder whether it's actually supposed to be a summer bralette at all. I realize my yarn is different, but I'm pretty sure the original is a llama & silk blend, so it can't be much cooler. Although I suppose the silk content could really make a difference depending on the percentages.

stashbusting
Mods: provisional CO, 4 rows garter stitch instead of 16cm on both sides
Here's the provisional CO from the back, as well as the shortened back bands. If I were to make it again, which I actually might since it's super comfy, I would probably alter the rate of increases so that I actually get a back band and the bralette cups don't stretch all the way around. It's a great stashbuster though, so if you have about 175 yards of fingering/sport weight yarn left over, I would give this a try!

stashbusting Julie Asselin
Easy to knit, repetitive lace pattern
 I've finally got some photos of the Hitofude Cardigan I finished a while ago! Next time, I'd make an extra repeat of the sleeves part, since I feel as though I would get an even better fit if the ribbing section were a bit lower down (it curls up almost like a raglan at the front, as you can see in the below photo). That being said, the current size is a pretty perfect fit, so it's more of an aesthetic thing.


Julie Asselin Merletto
Feathery lace fans out
I might have mentioned this before, but Hitofude only has 2 ends to weave in after you're done, as long as you didn't have to attach a new ball of yarn. 2 ends! If that doesn't convince you to go get yourself a copy of the pattern and knit it up immediately, it only took me 10 days to finish knitting it (and I'm pretty sure I was working on other projects as well during that time, so if you're a monogamous knitter, it might take you a week or less!), and the pattern itself, well written and easy to follow, is only... about $2.62 CAD, and if you're in the U.S., it will cost you less, surely! Anyway, I'd love to knit another of these beauties up. Another thing I'd like to do is to work with this yarn again - Julie Asselin's Merletto is extremely soft and silky, and although I had some trouble with splitting the yarn a number of times, once I got the hang of it, it was easy to work with and gave me very little trouble. It's also a bit of a plus that it's a Canadian yarn.

The below are just some re-shoots of a couple of things, namely my linen cardigan from my exhibition last year. I finally have finished photos of myself modeling it. The other one is also from the exhibition: the scarf everyone that participated helped to weave!


Karen Luk woven in fine print exhibition
Twills upon twills upon twills!
So first we have a clearer picture of the scarf and all the colours and different patterns of twill that went into it! I treasure this scarf very much and, after a bit of thinking about what to do with it since the warp was pretty much done after the exhibition, decided to weave it into my everyday life and wear it as a scarf. That way I get to remind myself of how well everything went then, and to motivate myself to create more opportunities for others to learn to weave! Along the same lines, I'm also going to be hosting an Introduction to Bookbinding workshop at TPL during the Culture Days weekend on Saturday October 1 between 2-4pm at the McGregor Park branch of TPL. I know it's a ways away, but I'm super excited about it, so I'm giving out some advance notice!


Karen Luk linen cardigan
A better shot of the line'n'cardigan (over the line)
The line'n'cardi (over the line) was knit all in one piece from the back over the shoulder line to the front, then the sides seamed, before picking up and knitting the sleeves. The neckline/edging was picked up and knit afterwards. I made it A-line in shape, which might have been unnecessary given how much extra fabric the body already has, but that just makes for more twirling opportunities!

Karen Luk linen cardigan
Obligatory twirl shot

Monday, July 25, 2016

WIPs (A.K.A. Playing Catch Up: the June & July Edition)

It's been a while since I've done much knitting or the like, or so it feels, so I'm glad I finally have something to post. Let's start out with the good news: I'm knitting a lot out of my stash!

Warning: this is going to be pretty long.


Do I keep it or does it go?
Is there such a thing as too many flounces? I think I might be hitting that point.

Mokoshi is very well-written & easy to follow, so it's not the designer's fault mine turned out rather loose. I know the reason, at least: my gauge was way off, in addition to which my gauge swatch lied to me (it's actually surprising it fits at all and isn't two times as large as it is!), so even though I tried to compensate for it, I compensated incorrectly. Knowing what I do now, I would definitely make the smallest size next time, maybe even scaling it down one more size from there. That being said, I'm not sure whether it's supposed to be this loose or if it's because I chose the wrong size/used the wrong yarn & needle size combo (went down a needle size to accommodate the linen of the Louet Euroflax). I can live with the positive ease though.


extra positive ease?
See that middle back bit that's coming out where my hands are? That's all extra!

What I'm really not 100% sold on right now is the second flounce at the bottom. Am I pushing it a bit with this super voluminous detail? And should I compound what might be an egregious decision - keeping the second flounce - by following the pattern for the fluttery cap sleeves too? I'm overstating it a bit, because I actually like it a lot, and it's just that frills aren't too much in my wardrobe at all. So it's just a question of whether to remove the second layer or not, and whether to knit the flutter sleeves or make them long sleeves with one layer of light frill at the end, in the fashion of eritml.
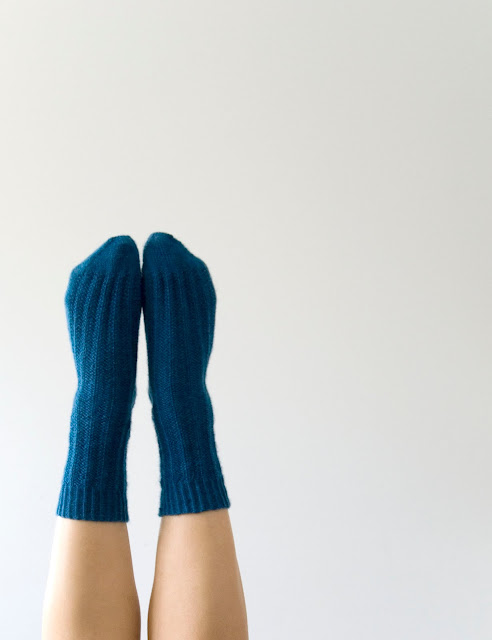


Starry Starry Night
Vestigial, in colourway Starry Night - pretty fitting, no?

Socks! For me! Finally! Using that Eden Cottage Yarns BFL Sock that I purchased in England a while back! I've knit a pair of socks before, but they didn't really fit well and they felt pretty half-baked, to tell the truth, so I've stayed away from them till now. But no more! Apart from the slightly tight cast-on for the first sock, these fit me so well I want to wear them all the time, never mind that it's summer right now with humidexes upward of 40C some days. Truth be told, the BFL isn't as soft as I'm used to with my socks, being a bit prickly and all. I'm not sure whether that's because of the heat or if it's the fiber though. What I am positive about is that I will much appreciate these once winter rolls around.

I knit Vestigial, which is a free pattern and coincidentally offers only one size. I also could not spot where the gauge was listed in the pattern itself - I might just be blind though - so thank goodness they fit! I'm pretty smitten with the finished socks, so I'd say it was worth blindly following the pattern this time.


no picture!
No pictures of the finished Summer Bralette yet. There may never be.

I set about translating the Summer Bralette pattern from Swedish - thank you Google translate! - the day it came out, cast on the day after, and finished the day after that, only to realize it was waaaaaayyy too loose. Needless to say, I didn't do a gauge swatch in between any of those steps, and although there was a nagging suspicion that the size looked way too large, I figured I might as well finish it and see what to change the second time around. The first try came out with positive ease. Not what you want from this pattern! So I got rid of the 16cm of garter stitch at the beginning & end (reducing it to 4 rows each), changed to a provisional CO, cast on half the stitches for the straps (50sts instead of 100 - I tried 75sts the first time and it was still too much), then did a 3-needle BO to the provisionally CO sts.

I do want to make a note, in case anyone else is using Google translate. It actually does a pretty good job with translating the pattern, except for some misleading parts: where it says "purl", it actually means to "knit" (you want stockinette for the most part), and when it says to "have 16 stitches wormed"/"bind off 16 stitches", it actually means that 16 stitches have already been bound off, so don't bind off another 16!
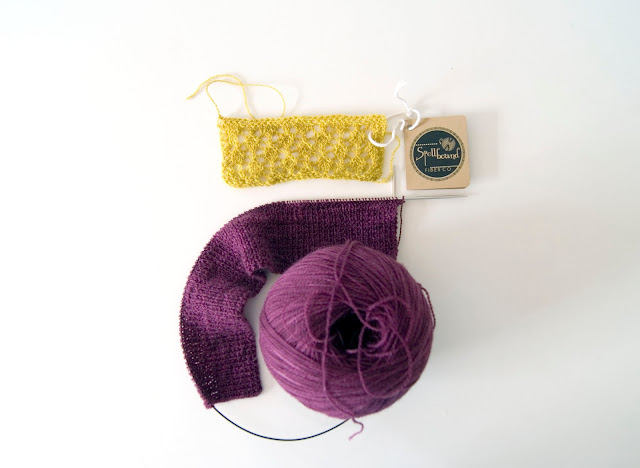

Vintage Lace Gauge Swatch
Not very good depiction of the lace here either though.

I've also started on a vintage sweater pattern that has an allover lace pattern, which the photo depicting said sweater does not actually depict at all. You can vaguely make out there's lace, but you can't for the life of you tell what the lace pattern looks like. And now you do, though admittedly not much clearer. Knitting on 2.0mm needles for a 1x1 rib is a bit torturous though, and I'm not sure I would recommend it to anyone to follow the pattern blindly as I am, especially given the lack of clear gauge - by which I mean I have no idea what the finished garment size is supposed to be, though by my own gauge of 24 sts = 4" in pattern, the finished garment will have +14" ease on me. I'm kind of doing this in good fun to see where it'll take me, but I'd probably want to just recalculate everything and give myself maybe +6" ease total for this. On the upside, I am using the Spellbound Fiber laceweight merino that I got from an installment of Fiberista Club, so that's going to be knit completely from the stash. I might have to supplement it with colourblocked sleeves or maybe the lower 3/4 of the back can be yellow? We'll see how it goes.


Llama Lace Americo Original
Finally decided on what to knit with this Llama Lace!

I waffled a bit with choosing what to knit with this, from Rhaedr to Citron before finally settling on Divinity. I actually cast on for all three of these, and there's nothing wrong with any of the patterns, but it didn't really seem to match the yarn. The cables of Rhaedr looked like they'd be lost (besides which I messed up the cables pretty early on, so I simply didn't try a second time, knowing it wasn't going to be the pattern for this yarn). And while Citron is a tried & true, I wasn't sure the Americo Llama Lace was actually going to be soft enough for my neck, not to mention I noticed I was having some difficulties breathing easily while knitting with it. I'm assuming it's due to all the fibers coming loose from the yarn that I'm subsequently inhaling, but I didn't think putting that yarn anywhere near my face for long periods of time would be a good idea. So I searched high and low for a lacy clothing pattern that I could squeeze out of my 765 yards, and Divinity's been on my list for a while, so that was that.


The one on the right.

And I also knit myself a Hitofude cardigan, which has been in constant use since it came off my needles using the Julie Asselin Merletto (in Cove) I purchased during the Lettuce Knit closing sale. I still don't have any photos of the cardigan itself, which is almost ridiculous, but seeing as it's been on me more often than not, let's excuse the lack of actual photos. Very well written, and I love the construction! Only two ends to weave in, as long as you only used one skein: the CO and the BO.


Now the slightly more painful bits:

nips & tucks left and right
Nips & tucks, here and there, left and right.

This has been in this state for about a month or two now. I had grand plans to wear this to the Team Up reception - I didn't make it in time due to some issues with the sewing - and now I have no particular motivation to finish it apart from having it done and out of the way, now. I also cut off a couple of inches from the original pattern, but realized that the hem is way wider than I thought, and looks better wide, so I'm going to have to undo the hem and sew an extra piece on that turns in as the hem. The collar also didn't work out at all, so that plan flew out the window pretty quick, in addition to which the lack of shaping, combined with the cotton fabric I'm using, don't work well together, giving me what looks to be a baby bump. So I've had to add vertical bust & back darts to fix that problem. Maybe if I were using something super smooth or slinky it wouldn't be as much of an issue?


in pieces
Seamwork Hayden shirt... still in pieces. Crinkled after months of sitting under itself.

... So this is supposed to be Hayden. I'm 98.2% sure (+/- 1.8%) that it's too small for me. It might be a perfect fit if I could ever get it over my head and shove my arms through, but I'd never get it off again. I cut out size 36, which measurements should fit me perfectly. The realization of which got me so down I still haven't sewn it together. In addition to which I belatedly searched up reviews of the pattern and noticed a couple of negative reviews mentioning size & fit issues, so it's probably, sadly, a bust. There's still only one way to find out though. But that would mean I'd have to actually sew it up and face reality to see what I can do to fix it - uhh... cut a larger size? - and that doesn't really appeal to me currently. Now I understand why my very capable friend, Haley, who learned how to knit in an incredibly short frame of time and delved right into lace & cables after some encouragement, felt like dropped stitches and other knitting mishaps like accidental increases or decreases were such big hurdles. I assured her they aren't, at all, so maybe I should just administer the same medicine to myself: suck it up and truck through!

On that same note, I searched up reviews on the Moji pants while I was at it, because those were what I really wanted to make, and found negative reviews concerning the lack of ease in those, too! Now, I can't actually razz on Seamwork patterns just yet since I haven't technically sewn anything from it, but I'm already getting bad vibes because of the reviews, so I've temporarily cancelled my subscription. It's probably for the best, considering how much - how little - sewing I actually do.


Primrose? More like butter!

I've been working on a project inside the confines of my mind that plays with recipe weight ratios and thinking about weaving my interpretation of several recipes up. The yarn is here. I finally got the right shade of yellow for the butter (the first round of yellow might do for Meyer lemons, but it's not butter as far as butter goes in Canada, from what I know). And I have absolutely no excuse to not have even calculated exactly how to warp this up. In fact, by my own timeline, I should have already finished a couple of scarves and started applying for exhibitions and marketplace stalls by this point! Alas.

It appears as though knitting is still my game, with sewing and weaving falling far far behind just now (and spinning having fallen off the radar altogether), which is quite unfortunate, but at least I'm knitting.